Monday, November 30, 2009

Deck the Halls

Really enjoying Reliant K's Christmas CD!

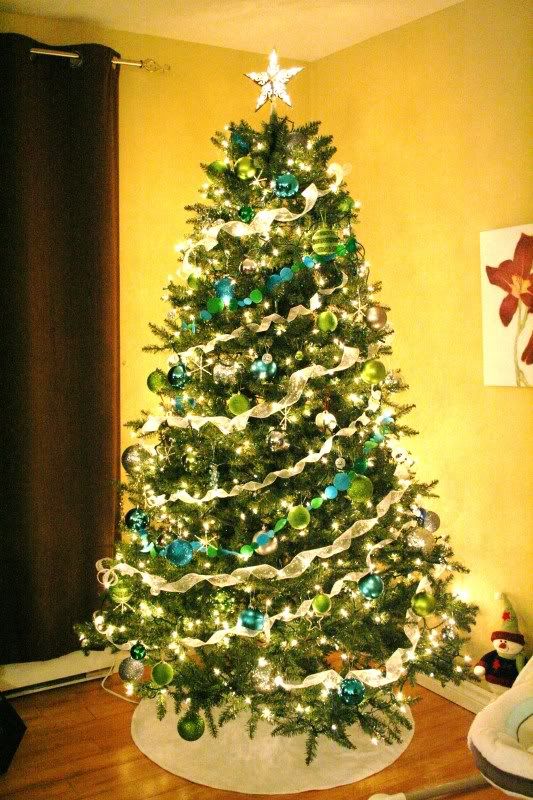
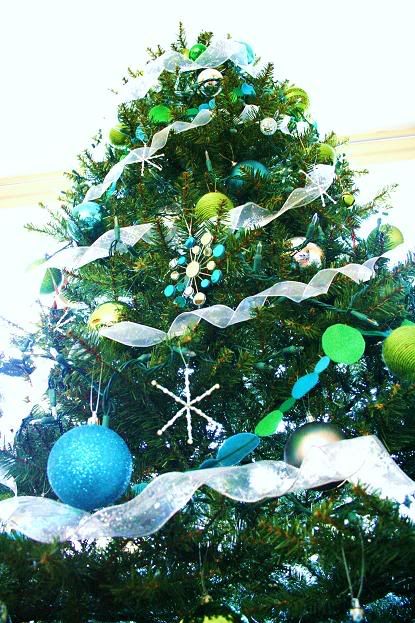
Here’s a better shot of my tree than the one I posted before, I’m really loving it (it’s ok if it’s not your style, we used to be the types to have a VERY traditional tree, but I wanted to try something different).

I’ve made a nice few things to put on this tree, to cut down on the cost of having to buy a lot of new decorations. If you notice there’s green and blue circles in a sort of garland on the tree (I need to make more of this). I’m going to post a few pictures on how to make this, very easy, very economical.

I’ve used the same method to make some Christmas themed banners, and since I needed to make one, the tutorial is based on the making of these banners. The circle garland is made the exact same way.

.

Today’s tutorial, making ‘garland/banners’

.

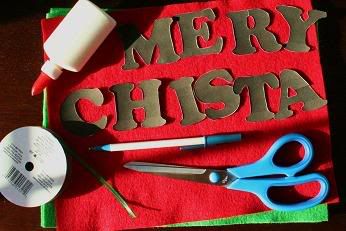
Here are the tools you'd need. Here I'm making a banner that read's Merry Christmas. I created my own stencils on the computer and printed them onto card stock. If you don't have card stock, then simply print them on regular paper and then glue onto an old greeting card (or two) and then cut it out. If you can't seem to find a font on your computer that you love, try going to dafont.com and check out some of the fantastic free fonts they have there. To make circle garland, or any shape at all, just make the shape stencil you require. For my circles I used four different sizes.

.

I'm also using felt, ribbon, white glue, scissors, and a good pen.


Once you've cut out your letters, trace their shapes onto your felt. It's best to turn each letter over, this way the ink of your pen will be on the back of the letter you create. This way you won't have tell-tale ink marks on the outside of your banner/garland.
To conserve felt place your stencils close together, trace all the letters you need. Here the letters for Merry Christmas didn't even use a full sheet of felt (I can buy felt for 2-3 sheets for $1!).

Cut out each letter, if you intend to have other projects you may want to keep any of the scraps. I use them for things like pin cushions, or anything that needs some extra stuffing/filler.

I keep all scraps and bits in a plastic bag. The fuller this bag gets, the more excited I get, I've got lots of plans for the scraps in there.


Take your ribbon, and line it across a table or other smooth surface. I then take my letters/circles and space them just below the ribbon so I can easily place them on the ribbon once I've added the glue.

I use a small amount of glue along the ribbon and then place the letter on top of it. I press down just gently. The glue will grab the felt without too much pressure. If you add too much glue then the felt will just absorb it.

Once you've added all your felt pieces to the ribbon, give it a few hours to dry. Don't worry too much about getting the water soluble glue on the table top, it washes right off. And the felt/ribbon won't stick to your table/smooth surface either. Instead of using glue you can hand stitch the letters to the ribbon, it will be more durable, but it's much more time consuming. You could run the letters through a sewing machine if you'd like, but I don't really feel it gives such a need appearance.
.
There are a number of Etsy sellers selling garland that's sewn, very similar to my felt circle garland, it does look nice, but for the purposes of hanging it on a tree, I was weary that the threads would tangle in the prickly branches. Obviously, use whichever method you think would best suit you.
.
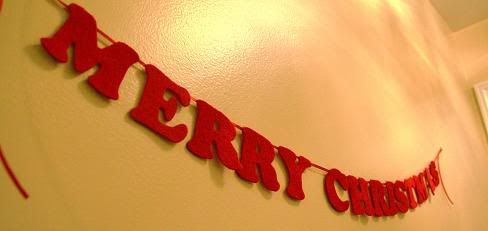
Here's one all dry and hanging in my entry.
I made another one, similar to decorate my fire place. We don't actually have 'fire' in our fireplace, so it's perfectly safe.

Another use for this craft would be to add a name to a door. Here's my son's bedroom door. I hand stitched this particular one since It will see more use then a few Christmases.

Saturday, November 28, 2009

Candy Cane and Almond Biscotti

So, as I had promised here are some shots of making the Candy Cane Biscotti, and since I was going to make bowls and things dirty anyway, I figured I'd double the recipe and make some almond biscotti as well.

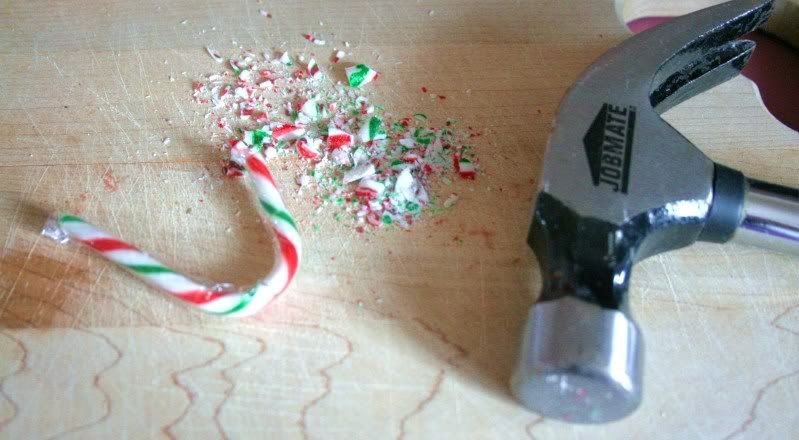
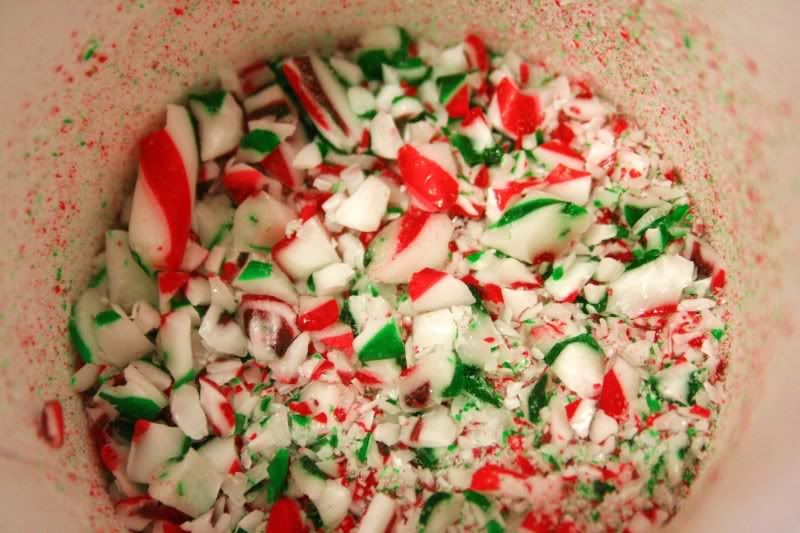
As I mentioned before, the best way to crush the candy canes, is with a clean hammer, and on a wooden or plastic chopping board. Hammer them with the plastic left on, or else shatters of candy will fly everywhere. Unwrap the crushed candy over a bowl, and discard the wrappers.

I don't get too picky about the size of the candy pieces, some end up like a fine powder, and others are around a centimeter long. The powder will help flavour the biscotti dough, and the larger pieces will add larger bursts of peppermint flavour.


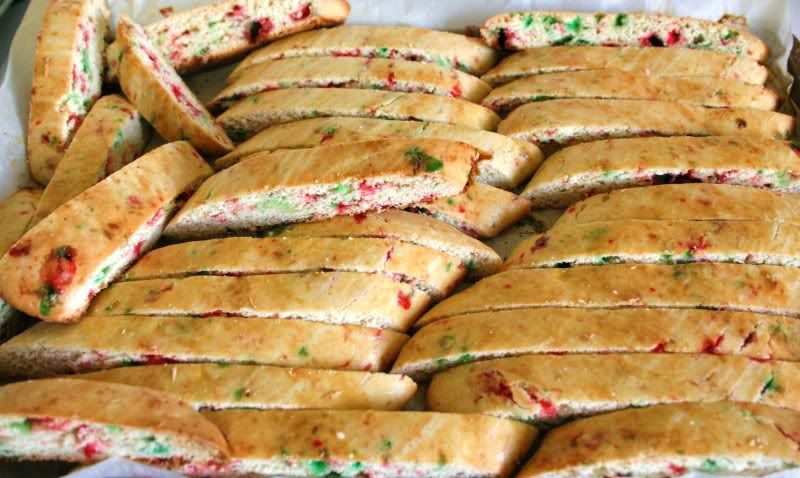
Here's how the Candy Cane biscotti looked when it was finished baking.


For the almond biscotti, I simply chopped almonds (which I bought already 'sliced' because they were the cheapest ones I found at the grocery store) and added 1/2 tsp of almond extract to the mixture. The almond extract isn't necessary, but I had it in my baking supplies so I added it.
Once the two batches of biscotti were baked and cooled, I melted some white chocolate, used a butter knife to spread it along the bottom edge of the biscotti pieces and then I sprinkled on extra Candy Cane pieces. I did the same for the Almond biscotti, but instead of sprinkling on the almonds, I dipped the end in a little mound of them. I was very pleased with how these finishing touches turned out.


Other ways to garnish your biscotti? A fast method for adding chocolate to biscotti once it's baked would be to line the biscotti up on waxed paper, and then drizzle melted chocolate over them. Try drizzling white chocolate first and then adding milk chocolate afterwards. Or, try dipping the entire end of a biscotti piece into a deep bowl of melted chocolate, this might be a great idea for anyone with a big sweet tooth.
Hope you enjoyed my biscotti 'how-to'.
Tomorrow, another Christmas decoration how-to post.

"TransParent”

Whoever coined the cliché; ‘Blood is thicker than Water’ in terms of relationship was wrong. Physically, in consideration of scientific principals, yes it’s a fact that blood is thicker in consistency than water is. The cliché refers to relationships, to family primarily; apparently it first appeared in 1670 as a Scottish Proverb (source), and in the context of relationship, it is wrong.

.

This may be the most transparent I’ve ever been and will ever be to complete strangers, the vast world beyond my inner sanctum of acquaintances and friends of old. It is quite possibly the most transparent I will ever be here in this blog, or with the vastness which is the random reader who may lurk or pass by unknown. I’m not sure what is propelling this; it may be the inability to sleep, induced by the large amounts of coffee I drank. Maybe it is some desire to let the world know, that I’m okay. It must be said, it must be known; that blood is not thicker than water in my heart.

.

Confused? Please let me enlighten you with some background information.

.

I am a 26 year old female, who was lovingly raised by her grandparents, who were truly and wholly parents to her. With a birth mother who gave her some of the greatest gifts she could ask for: life, as well as a life she herself could not provide (by allowing someone else to raise her daughter). I’m forever grateful for that. Here’s the hard fast cold fact by which this post surrounds itself; I’ve never met my father, nor have I had any significant contact with his immediate or extended family. (Please don’t pity me, continue reading instead).

.

As a child, this did bother me some. I knew there was more, some rejection that lurked and tried to hurt me. I suppose the world is always big and scary and with lots of sharp edges to a child. Where everything that is not loving in nature, is harsh in nature. I was more confused by my situation then tormented; it was lack of knowledge and not blood relation that worried me.

.

As a teenager, when the entire world is dramatic and bold, the situation seemed somewhat dramatic and bold. I don’t know what it was; over whelming emotion would be my best guess. I never wanted anything, never asked for anything and never wanted to seek anything from those blood relations, whoever they were. I think it was more the knowledge that they were not a part of my life that creeped in at the corners of recognition, played on my mind and hid in the shadows from time to time. I suppose the illusion of rejection is stark for a teenager, any teenager.

.

As my teenage years progressed into adult hood, even before graduating High School, I knew that the quote about blood and water was a farce, a rude lie. I had already lived a vivid and full life. I knew the true definition of family wasn’t defined by blood lines on some family tree. Family in its truest and most beautiful form wasn’t born from blood obligation, a sense of responsibility. Family was born of love, of the decision to stand by someone and stand with them. My family spans a large number of people I know that I can depend on, some have been in my ‘family’ for a season (even if they are not in my life now, I will always love them and will come running to their aid if they call), but others are there true and fast, and they’ll be there till the end of time. They are the kind eyes that listen, the hands the help, the words spoken that are true enough to stand on. Family are people you can turn to at any time.

Sure, I do think of those blood relations from time to time, like when I graduated High School or when I got married, and once in a while now that I have a son. Is there a place in my heart for them? Sure. Are those blood relations family? No. Am I bothered by that? No. I have all the family I need, and my heart feels full.

.

My point is, I’m not bitter, and never was. I’m not hurt nor do I feel rejected or broken. I’m not wounded, nor do I need to be pitied. I am happy, my life is full, and my family is perfect. If any of you, friends (old or new) have ever worried about this, please don’t. There’s no need to whisper about this in secret as if some injustice or crime has been committed against me, I am happy, I am well. I pray that whoever they are, wherever they are, that they are happy and well too. I have all I need, water may not be all that thick, but love sure is.

Friday, November 27, 2009

Perfect Biscotti for the Biscotti Newbie’s

Many friends of mine on Facebook were curious about making the Candy Cane biscotti that I had made a few weeks ago. I decided that for those who’ve never made Biscotti before and may be a little nervous about following a recipe and not knowing exactly how each step should look, that I’d create a little baking tutorial. I’ve been a fan of a recipe that I found on Culinary in the Desert. I use this recipe for most of the biscotti I make, although I always alter it a little. The recipe is called Easter Biscotti and uses Jelly Beans. It’s very simple to substitute almost anything you wish for the Jelly beans. Today I made it with chopped red and green M&M’s, chopped almonds, and some chocolate chips thrown in as well (why? Because these are the items I had on hand, seriously, you can use most anything that’s yummy).


One great thing about this recipe, is that you probably have all of these ingredients already in your home.


“Easter Biscotti” (as shown on Culinary in the Desert, with some of my additions)

Ingredients


3 cups all-purpose flour
2 teaspoons baking powder
1/2 teaspoon salt
4 tablespoons unsalted butter, softened [¼ cup]
1 cup sugar
4 large eggs, divided - at room temperature
2 teaspoons vanilla
12 ounces Jelly Beans [or
whatever your sweet tooth is craving]

Preheat the oven to 375°
[Here I deviate from the recipe and heat my oven to 350-ish instead.]


In a medium bowl, sift together flour, baking powder and salt.

In a large mixing bowl, cream together butter and sugar until light and fluffy. Add 3 eggs, one at a time, beating until incorporated. Mix in the vanilla.


Add in the flour mixture and mix just until combined.


Using a wooden spoon, stir in the Jelly Beans. The dough may be a bit sticky. [using floured hands to mix in the candy may help]


Scoop dough onto a lightly floured surface [heavily floured helped me more, I brushed off any extra flour afterwards]. Divide the dough into 2 pieces. Take one half and roll lightly back and forth making a log about the length of your baking sheet. Carefully place it on a baking sheet lined with parchment paper. Repeat with the second piece. [Please note, the Parchment paper is CRITICAL, parchment paper shouldn’t be replaced with wax paper, which is less durable in the heat, and will result in a very ‘smoky’ kitchen].

Using wet fingers if the dough is stick, flatten each log a bit. [I kept my hands floured, also just brush away any excess flour from the dough at this point].

In a small bowl, whisk the remaining egg and brush evenly over each log. [Don’t use ALL of the egg, it’s unnecessary, this simply adds a nice shine to the top of your biscotti. Any reserved egg can be refrigerated and used for something else]


Bake for about 23-28 minutes or until they are slightly golden brown. [ I baked for just 15 min, sometimes a little longer. Too long and your biscotti will burn on the bottom, not yummy].


Remove from the oven and let cool for at least 10-15 minutes (can go a little more.) Using a serrated knife, carefully slice them on the diagonal into about 1/2" slices.


Stand each slice back on the baking sheet - it is ok if they touch.


Bake for another 10-12 minutes until the edges turn a slight golden brown. [I reduce the heat here, possibly to 300 and then check on it at 8 min and leave it for a few more in if necessary].

Transfer to wire rack to cool completely. [to further toast the biscotti and make sure the outsides are fairly dry, I turn them on their sides, and put them back in the oven (while it's turned off, but still hot) for another 10 minutes. ]


I haven’t decided if I’ll add any chocolate to the outside of this biscotti, it’s simple and beautiful just as it is, and very tasty.


Making Candy Cane biscotti is the same, with crushed candy cane [to save yourself the pain here, use a wooden or plastic cutting board, keep the candy canes wrapped, and hit with a hammer. Then remove the crushed candy from the wrapper into a bowl. This is the cleanest and most effective method, using a poultry pounder may work as well, and a rolling pin does, but I find a hammer is best]. I then melted chocolate (I used milk because the husband and I like it best, but white would be just as nice), used a butter knife to spread it along the bottom edge of the biscotti and sprinkled candy cane over it. Then simply give the chocolate time to set, in a hurry? Refrigerate it for a minute. And you’re done. Culinary in the desert also has a Candy Cane recipe available if you’d prefer to use that here; Candy Cane Biscotti.


I’d take the time to make some Candy Cane biscotti today and post a few photos, but I’ve run out of sugar and vanilla. I’ll post some tomorrow.


Check out my husband’s blog here; Memory Card

Tuesday, November 24, 2009

Peppermint Happiness

As a family of three, we decided last night to put up our Christmas Tree.

Forgive me for rhyming, but once I had the 'three' in that sentence, I couldn't help myself. To make the experience a little more festive, I made some peppermint lattes, unfortunately the Candy Cane Biscotti I had made a week ago has been devoured. I need to find time to make more.

Here's our tree, it's still not the finished product, but after several years of wanting so badly to decorate with turquoise and green I've finally seen it through. I've a lot of decorations left to make for it, I'll post a much better photo once it really feels complete.
Along with the bulbs covered with yarn I've also made beaded snowflakes. Like the up-cycled bulbs this is also very straight forward. So here's a quick decorating idea/not-so-in-depth-tutorial.
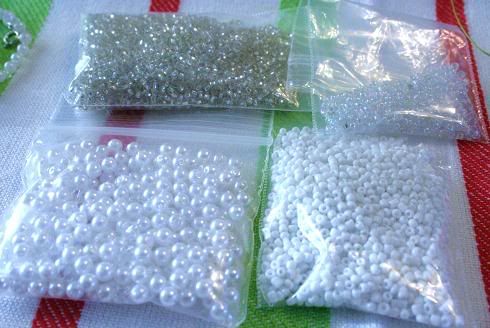
I'm a pack rat, so I didn't need to purchase any new supplies. I happy to have finally put these beads to a second use, I used them a few years ago to make the jewelry for my wedding. Call me cheap, I like it.


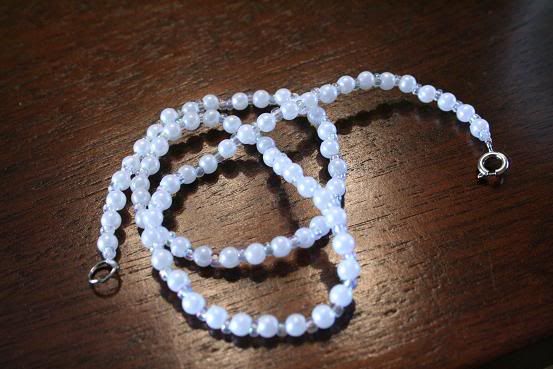
Below is a trial necklace I made before switching out the seed beads out for crystal cut glass beads. The reason I've included a shot of this, is because for those who have old beaded necklaces laying around this is a great opportunity to up-cycle those into something new!


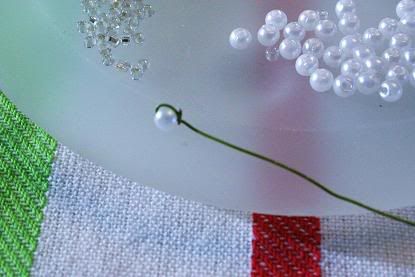
here are the supplies I used, some heavy duty floral wire (also left over from my wedding, silver wire may be more suitable, but be sure to buy a good sturdy gauge), scissors (very strong once, since I used them to cut the wire, but a small pair of wire cutting pliers would work wonders in this craft, I have some but couldn't find them), beads and some lighter gauge wire.


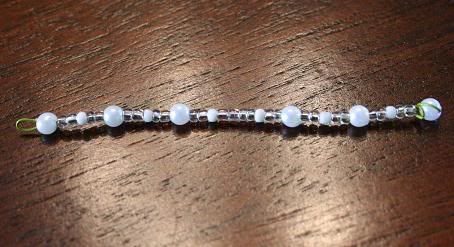
Cut a length of wire, however long you would like the diameter of your snowflake to appear, and add an extra few centimeters. Wrap the wire around one bead, to create a stop on one end. fill the wire with beads, keep the beads a little loose on the wire. Wrap the wire at the other end. Create three like this.
Find the center of your wires, and twine the three completed arms of the snowflake together. I used some lighter gauge wire to make sure everything was secure afterwards. If these steps make you nervous, hot glue will work fine to keep the three parts of the snowflake together.

I attached a loop of fishing line to hang it with.

The finished product:

Simple? Yes, very. It's a little time consuming, but very pretty. Another use would be adding it to a gift tag as a decoration/added gift. Extremely cost effective. Happy decorating readers!

Wednesday, November 18, 2009

Christmas Christmas Time is Near!


Admittedly, I am somewhat of a Christmas Fanatic. I'm also frugal and love most everything modern/new. It's a bit of a stretch to consider the environment and green living when you're obsessed with shiny things and clean lines. Here's a project I've been wanting to do for the past two or three years. Since I've seen beautifully coloured "yarn bulbs" decorating store front Christmas Trees. I'm aware that I'm just getting in at the tail end of this Christmas trend, but once an idea enters my mind, it must come to fruition before I can move on to newer things.

Hence, I bought a ball of yarn, took some Christmas bulbs (plastic ones) that no longer suit the style I hope to decorate in this Christmas and have covered them with some lovey green yarn. If you would like to do this, please don't use glass bulbs, as it could be a little unsafe, and you could easily substitute styrofoam balls for the bulbs I used, but I thought I'd just recycle the ones I had. Here's how I did it.

Some very simple and basic tools, craft glue that will dry clear, bulbs of your choice, a pencil, scissors and yarn (you could recycle some yarn if you have an old sweater you'd like to unravel, or some ends left over from other projects for a striped ornament).

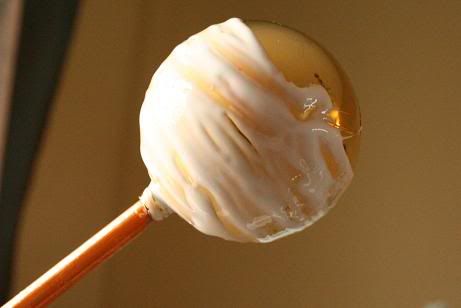
First, I removed the metal clasp on the end of the bulb, and used a wooden pencil to wedge the bulb onto (this is why it's important to use a plastic bulb, glass might easily shatter at this stage). The pencil makes the bulb much easier to handle. Then generously added the glue. The reason I used so much is that the ball is very smooth, you can sand it down a little if you'd like, but in order to keep the yarn attached a generous amount of glue will not only help keep the yarn stuck to the bulb, but also the edges of the strands will stick together. No one wants the yarn to start falling off in loops or strands in the middle of the Christmas season.

Next, beginning with the top end of the bulb twirl around the end of the yarn. Its best not to cut the yarn from the ball or else you may find you do not have enough to cover the entire bulb in one strand.

Then carefully, so you do not pull the yarn off of the bulb, begin wounding the yarn. Try to keep gaps as small as possible where the strands meet. This is especially important if you are covering a bulb whose colour contrasts greatly from the yarn you are using.

Obviously, continue winding. Adding more glue as needed.


At the end, simply press the last bit of yarn into the glue and cut to remove your bulb from the ball of yarn. Using the palm of your hand gently press all around the bulb to make sure the yarn adheres to the glue. Carefully remove the pencil, wiggling it might help get it out. Then gently press the metal clasp back on.


Once the clasp is on, hang the ball on something to dry, I used a broom handle that I had lain across my table. It should not take long to dry, and repeat the steps to make as many bulbs as you would like.
Environmentally friendly, cost effective (the yarn cost me $4.50, everything else I had on hand) and very cute.

Monday, November 9, 2009

Jedi Benjamin Kenobi


Wow, who is potentially the worst blogger in the world? The new mom with a very busy husband, whose entire family has been fighting virus after virus since the beginning of October, surely I can’t take all of the blame for neglecting my blog. We had an extremely busy October month with several weekends away from home for my husband’s work, which I thoroughly enjoy but we came home sick from each one. It seems like Canada’s H1N1 crisis is much more severe than that which the US are facing, but the hype and nervousness over the virus and the ongoing vaccinations are dominating everyday life. My husband and myself received vaccinations, but were only able to get them because we’re caretakers for a child under 6 months of age who cannot be vaccinated himself. I’m working diligently to keep the monster away from any germs or large gatherings. I’d rather take those few precautions then end up with a sick and sad little boy.


The baby is 4 months this week, I’m astounded. I can hardly remember a time when he wasn’t with us, he has brought that much meaning to our lives, and yet it seems as though it were only a few days ago we were waiting for him to arrive. Regardless of my paranoia over germs I did take him to a few houses for Halloween, I had been obsessed with dressing him up as a Jedi for his first Halloween since I found out I was pregnant. Obviously not satisfied with the cheap craftsmanship of most costumes, I made my own. Check him out up there, looking all handsome and adorable!


Speaking of neglecting my blog, I’ve also woefully neglected my shop. It’s unreal how much I’ve over-estimated my ability to work at my sewing machine with an infant. He finally seems to have hit a schedule of sorts, which means I can now begin to schedule my day along with his. I’m hoping this means I’ll find time to sew. Obviously everything is still shipping on time, it’s just getting difficult to create new items to post and keep the shop updating.


Besides for that, it seems as tho the economy has yet to recover for most of the world. While things seem to be looking up for most of Canada, I’m not seeing the usual popular items selling like they once would. Praying things perk up with Christmas approaching. Really need to get back to promoting and adding new items.


I promise to write something captivating and witty as soon as I find the passion and time!