
Many friends of mine on Facebook were curious about making the Candy Cane biscotti that I had made a few weeks ago. I decided that for those who’ve never made Biscotti before and may be a little nervous about following a recipe and not knowing exactly how each step should look, that I’d create a little baking tutorial. I’ve been a fan of a recipe that I found on Culinary in the Desert. I use this recipe for most of the biscotti I make, although I always alter it a little. The recipe is called Easter Biscotti and uses Jelly Beans. It’s very simple to substitute almost anything you wish for the Jelly beans. Today I made it with chopped red and green M&M’s, chopped almonds, and some chocolate chips thrown in as well (why? Because these are the items I had on hand, seriously, you can use most anything that’s yummy).
One great thing about this recipe, is that you probably have all of these ingredients already in your home.
“Easter Biscotti” (as shown on Culinary in the Desert, with some of my additions)
Ingredients
3 cups all-purpose flour
2 teaspoons baking powder
1/2 teaspoon salt
4 tablespoons unsalted butter, softened [¼ cup]
1 cup sugar
4 large eggs, divided - at room temperature
2 teaspoons vanilla
12 ounces Jelly Beans [or whatever your sweet tooth is craving]
Preheat the oven to 375° [Here I deviate from the recipe and heat my oven to 350-ish instead.]
In a medium bowl, sift together flour, baking powder and salt.
In a large mixing bowl, cream together butter and sugar until light and fluffy. Add 3 eggs, one at a time, beating until incorporated. Mix in the vanilla.
Add in the flour mixture and mix just until combined.

Using a wooden spoon, stir in the Jelly Beans. The dough may be a bit sticky. [using floured hands to mix in the candy may help]
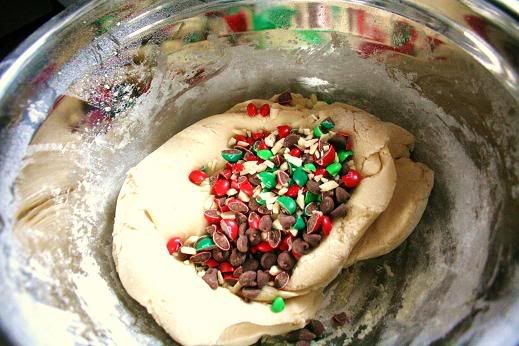
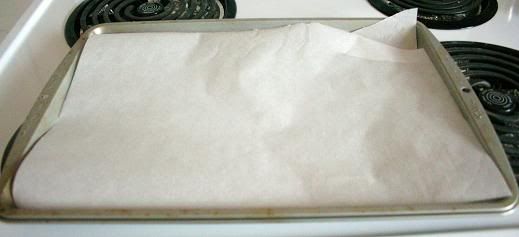
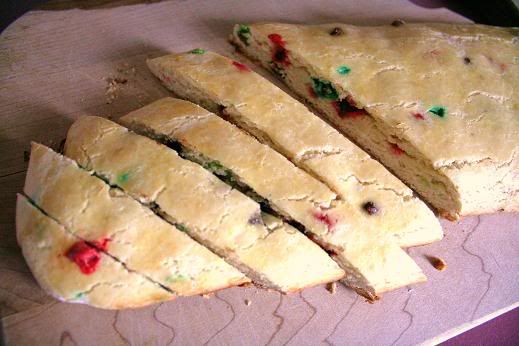
Scoop dough onto a lightly floured surface [heavily floured helped me more, I brushed off any extra flour afterwards]. Divide the dough into 2 pieces. Take one half and roll lightly back and forth making a log about the length of your baking sheet. Carefully place it on a baking sheet lined with parchment paper. Repeat with the second piece. [Please note, the Parchment paper is CRITICAL, parchment paper shouldn’t be replaced with wax paper, which is less durable in the heat, and will result in a very ‘smoky’ kitchen].
Using wet fingers if the dough is stick, flatten each log a bit. [I kept my hands floured, also just brush away any excess flour from the dough at this point].
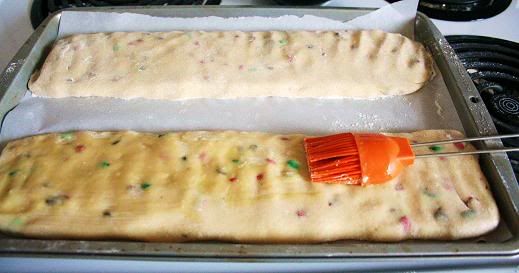
In a small bowl, whisk the remaining egg and brush evenly over each log. [Don’t use ALL of the egg, it’s unnecessary, this simply adds a nice shine to the top of your biscotti. Any reserved egg can be refrigerated and used for something else]
Bake for about 23-28 minutes or until they are slightly golden brown. [ I baked for just 15 min, sometimes a little longer. Too long and your biscotti will burn on the bottom, not yummy].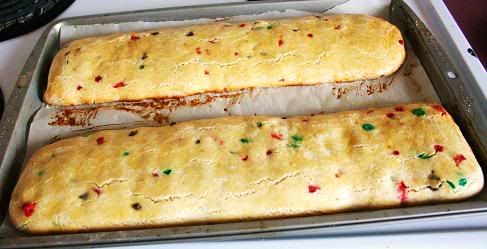
Remove from the oven and let cool for at least 10-15 minutes (can go a little more.) Using a serrated knife, carefully slice them on the diagonal into about 1/2" slices.
Stand each slice back on the baking sheet - it is ok if they touch.
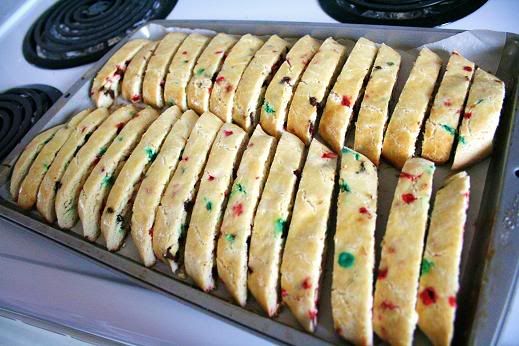
Bake for another 10-12 minutes until the edges turn a slight golden brown. [I reduce the heat here, possibly to 300 and then check on it at 8 min and leave it for a few more in if necessary].
Transfer to wire rack to cool completely. [to further toast the biscotti and make sure the outsides are fairly dry, I turn them on their sides, and put them back in the oven (while it's turned off, but still hot) for another 10 minutes. ]
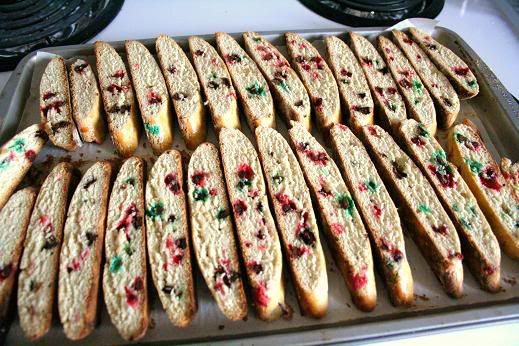
I haven’t decided if I’ll add any chocolate to the outside of this biscotti, it’s simple and beautiful just as it is, and very tasty.
Making Candy Cane biscotti is the same, with crushed candy cane [to save yourself the pain here, use a wooden or plastic cutting board, keep the candy canes wrapped, and hit with a hammer. Then remove the crushed candy from the wrapper into a bowl. This is the cleanest and most effective method, using a poultry pounder may work as well, and a rolling pin does, but I find a hammer is best]. I then melted chocolate (I used milk because the husband and I like it best, but white would be just as nice), used a butter knife to spread it along the bottom edge of the biscotti and sprinkled candy cane over it. Then simply give the chocolate time to set, in a hurry? Refrigerate it for a minute. And you’re done. Culinary in the desert also has a Candy Cane recipe available if you’d prefer to use that here; Candy Cane Biscotti.
I’d take the time to make some Candy Cane biscotti today and post a few photos, but I’ve run out of sugar and vanilla. I’ll post some tomorrow.
Check out my husband’s blog here; Memory Card
2 comments:
Thank you so much for posting. I'm going to have to give this a try!
Mmmm... looks tasty!
Merry Christmas!
Post a Comment